Showing posts with label diy. Show all posts

Friday, June 1, 2018

The Evolution of My Office Renovation

This was taken the first day we began working on the house.
When we bought our house nearly two years ago, we knew that it needed some work. When we toured the house we saw that the house had great bones, it just needed some elbow grease, some paint, a bit of spackle, some fresh curtains, new flooring, and a decorative touch. It also needed imagination, patience, and time. So when we were handed the keys over Labor Day weekend, we couldn't wait to get into the house and start pulling up the carpets and clearing away the debris.

Flynn enjoyed exploring the new space.

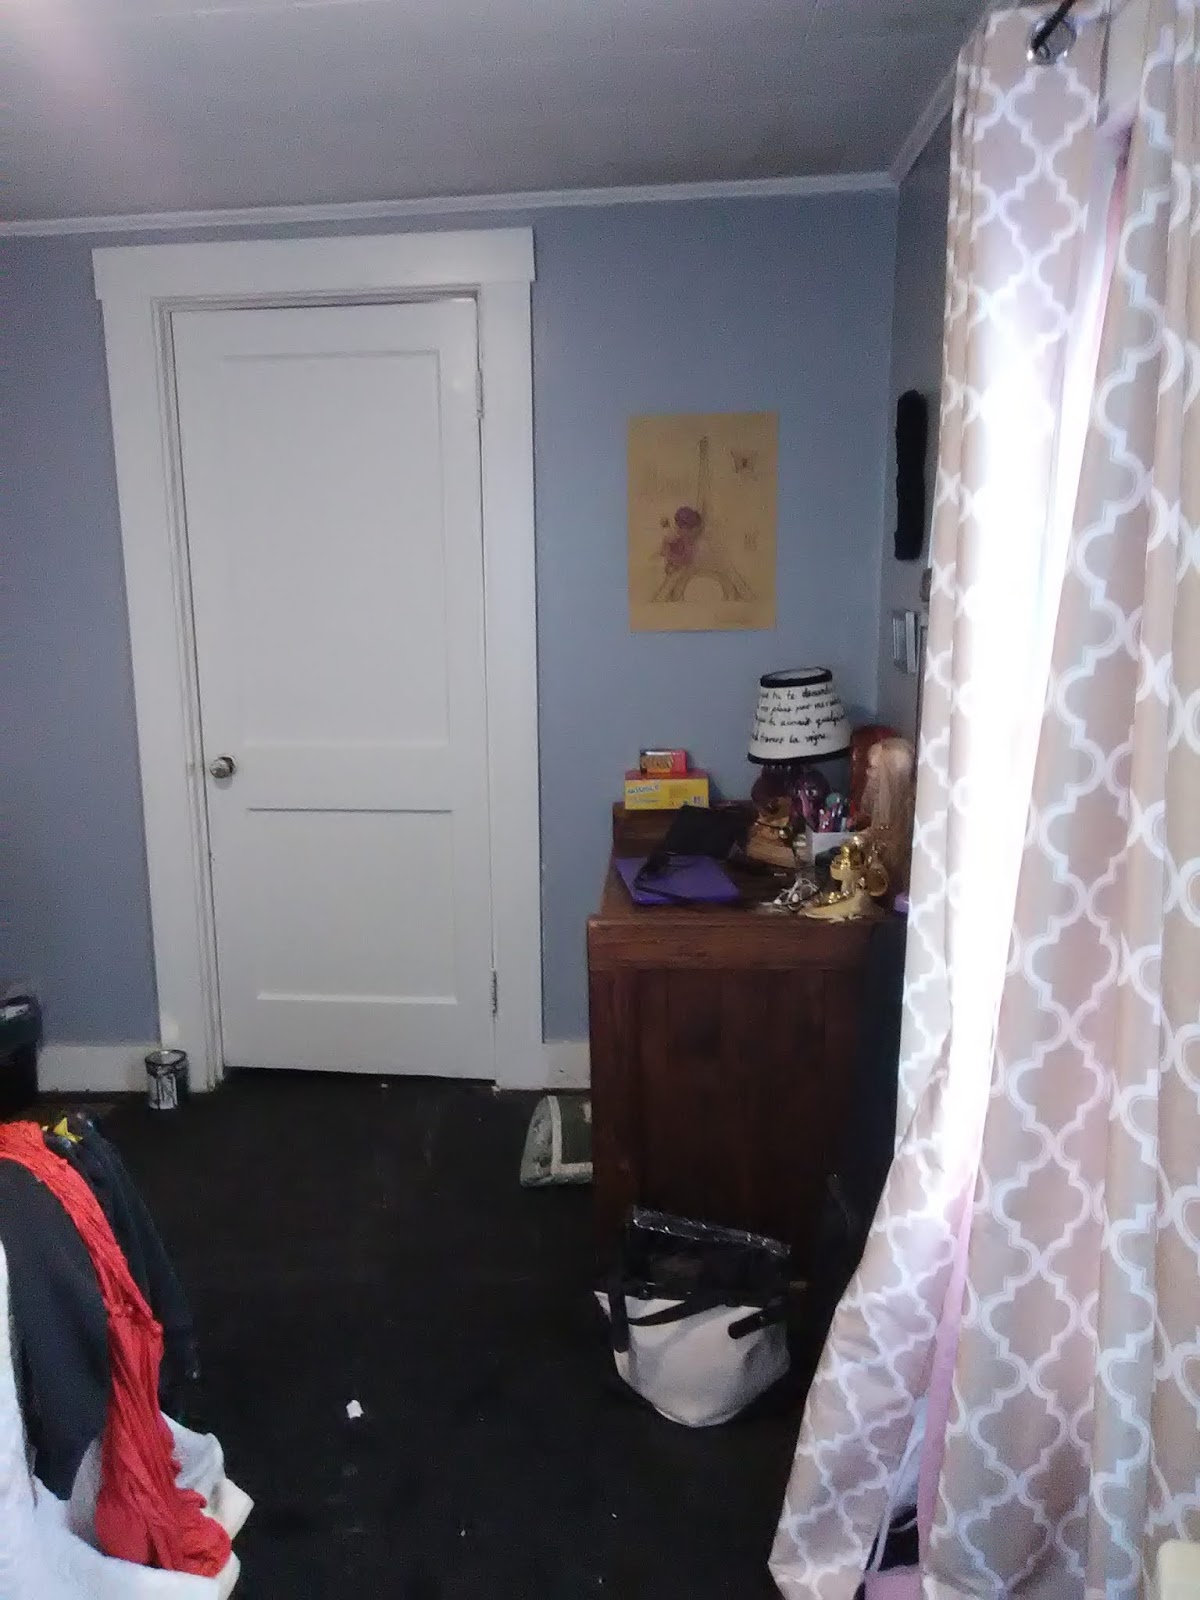
The house had enough bedrooms for each kiddo, which was great. The room that is now my office was the bedroom of the oldest child who has since gone away for school, life, etc. We let each child pick out what the wanted their room color to be and we bought paint accordingly. We were on a very tight budget so I actually blended a can of white paint that we already had with a bit f black paint that we got marked down at Home Depot (not sponsored). The walls in the room had been an off-white or cream color with very old wall to wall carpeting. There was also an odd shelving unit built into the wall that had access to the stink pipe. I really didn't want that pipe visible, so we removed the shelving and walled it off. The room opposite to the office is the bathroom and that entire room had to be gutted. I'll post about that another time.


So, as requested by the son, I painted the walls grey and the carpeting was removed and I painted the floor black. He decorated the walls with his t-shirt collection and it was a typical teenage boys room. After he graduated high school and went away to college I wasn't jumping at the bit to redecorate. I wanted to wait at least a year and see what would happen. However, I decided to move along with the process when it was clear that he was growing up and eager to be on his own. His bedroom was becoming a spot for debris to land and was a waste of valuable space.  I decided that it was time for me to make an office, where I will eventually be able to work and keep the spare bed in there just in case a guest needs a comfortable place to rest.

Fearing the raisin would overpowering for a small room, I used it to create an accent wall.


Eventually, the door to the bathroom will be removed and the wall will be finished.

I based my entire design on a California Raisins lamp that my grandmother had made me when I was a little girl. I had recently unearthed it from my parents' attic and wanted to use it in my new office. I chose a color that would closely match the color of the raisins on my lamp. I chose Color Place Rich Raisin in a satin finish. I used black chalkboard paint to paint my floor. This made the floor more durable and doesn't scratch as easily. 

Murr really likes the room. It is a nice space to take a nap.


I made curtain rods with wooden dowels that I found at Hobby Lobby (not sponsored), painted them black, and I made finials using a black macrame yarn/rope and tied them into fishermen's knots. I purchased two sets of thermal/light blocking curtains on ebay (not sponsored) for $10.00/set. I also bought gold vinyl star decals on Wish (not sponsored) for $1.00. If you haven't noticed, I decorated this room on a budget. It took a lot of time to gather all the materials together, but it came out great. I will do a part 2 to this post, showing the decor in more detail. This will be a cozy space to work in. Right now I am waiting for Rory to get a little older and to outgrow his chewing habit. It is very distracting to work in the office with him in it right now. Also, Mildred is currently residing in my office with her litter of kittens that she birthed a week ago-more on that in a later post. For the time being, my office/guest room is a kitten nursery and I likely won't be doing much work in there until September. For now, I just grab materials from there to use for projects that I work on in other places in the house. Stay tuned for the follow-up to this post which should be up next week. Until next time~ Toodahloo!

Wednesday, January 17, 2018

2018 Planner DIY


For the past couple of years, I have relied on a planner to help me to stay motivated and organized. I have always been a list maker and I was obsessed with my Trapper Keeper when I was a kid. I decided to try to make my own planner this year, one that was more suited to my needs. The first planner that I used for 2016 was a nice planner, but it was wrong for me. The planner was organized by each month. Then, each month had pages for each week. So, if you opened the book, the pages that were side-by-side were for each week. The week pages included each day of the week broken down by the hour. It was way too much for me. I think that kind of planner is great for someone who is super busy and juggling many tasks and schedules. For me, I felt like I had to schedule each hour like I had to fill in the time with chores, tasks, and goals. Then, if I fell behind schedule or didn't complete each task, I felt like a failure. Not to mention, the planner was uninspiring. 
For 2017, I needed something a lot more simple. My husband got me a planner that I really liked. It was a pale blue moleskin cover and it was a day planner. It was organized by the month, with a calendar for each section and then each day had a section to write down anything that you wanted to remember to do, almost like a journal. It was what I needed then. I never felt like a failure for not getting stuff done. 
For 2018, I wanted a planner that had a little bit of everything in one spot. I wanted a section for keeping dates and a schedule, I wanted a section for organizing the budget, I wanted a section for meal planning, and I wanted a section for blog planning. That way, everything would be kept in one spot and it would be so much easier for me to function, it is my household binder of sorts and I love it.
You can buy all kinds of planers out there, but since my needs were so specific, it made more sense for me to make my own. I bought my supplies at Walmart and The Dollar Tree. The actual three-ring 2-inch binder came from Walmart. I found it in the stationery/office supply section. Sold right next to the binder was a bunch of dividers that were the same size s my binder, so I grabbed those too. Then, I bought a bunch of fun paper clips with flags on them, also at Walmart, I think I spent less than $10.00 on all the supplies that I bought from Walmart. 


The rest of the supplies I got at The Dollar Tree. This includes stickers, washi tape, notepads, notebooks, an elasticated headband, gluesticks, a desk calendar, pens, and hot glue. I adhered velcro to the back of the notebook (above) and to the inside of the cover of the binder. That way I could remove the notebook if I wanted to write things down. On the inside of the back cover, I hot glued a cute sticky notepad that I found at The Dollar Tree.


On the back of each month, I glued these sections of the desk calendar. That way, I'd have a place to write down more notes and I wouldn't be wasting part of the calendar. I had already had cardstock on hand. I  cut the desk calendar to size and glued it to the cardstock in order to make it sturdier and then I marked where the rings were and used a hole punch to make the holes to poke the rings through. 


Then, I began the fun part, the decorating of the calendar. I was inspired by the planner videos of  CheapCraftyGirl on Youtube. I intend to get more stickers for each month as the month approaches and jazz up the pages more, but this is just the starting point. I think that approaching each month at a time and sitting down to decorate the monthly pages will be fun and a nice way to relax, it will also be a great creative outlet. I think that starting each month with decorating the pages will keep me motivated to stay on track.
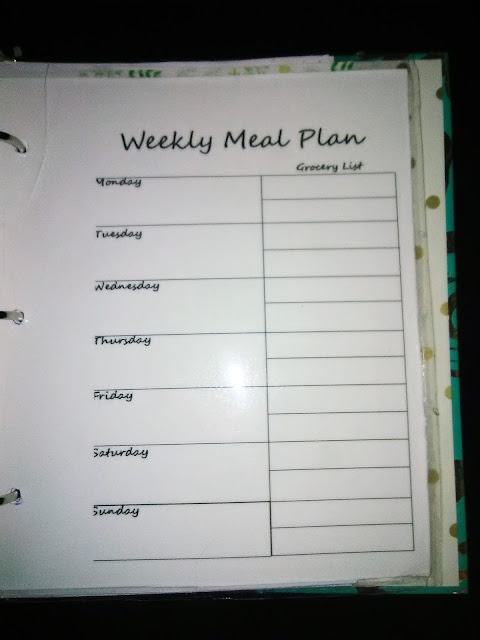


For the meal planning section, I designed my own weekly chart on Windows and I laminated it. That way, I could write down a meal plan for the week with a dry erase marker and be able to edit the plan as needed. Then, when the week was done I could erase it all and start fresh. I also printed out a meal idealist that I made on my computer a long time ago. I just wrote down meals that were cheap and easy to make and that my family enjoys. This list has helped me come up with many meal plans; it's great to have when I can't think straight or when we have a tight budget. Having all of the ingredients listed in the meals makes it super easy to make a grocery list!

For the budget section, I printed out monthly budget charts that I found for free on Pinterest, so I printed twelve of those. I also printed out a bill tracker chart that was for the entire year. That chart was also free to print and found on Pinterest. I also found a nice weekly blog planner free to print on Pinterest. Lastly, I went on Pinterest and found a bunch of inspirational quotes and I printed them out to stick throughout my planner. Sometimes, it's nice to read kind words when you're being hard on yourself. Lastly, once my planner was assembled, it needed something to keep it tight. With all of those pages and additional notebooks, the binder wanted to splay open a bit. So, I bought a bunch of headbands from The Dollar Tree. The packet came with an assortment of colors and I chose one that I thought would complement the teal. I simply used hot glue to glue the headband to the back cover of the binder and positioned it where I felt it could keep the binder closed. I like the way it came out. I really didn't spend a whole lot on this planner/household binder. I will continue to buy more stickers and washi tape for each month, but I will be buying them at Walmart and The Dollar Tree since I am able to find adorable supplies at those stores and they are very inexpensive. I can't wait to go find some Valentine's themed stickers! This is going to be a lot of fun! With any luck, this planner will help me feel more confident in my managing of the household and I will feel less scatterbrained. Soon, I will be decorating the house for Valentine's Day and before I know it, it will Be March and I will be decorating for St. Patrick's Day! Until next time~ Toodahloo!


Friday, October 27, 2017

DIY Cake Stand Using Dollar Tree Supplies


If you follow me on Instagram, you might have seen a post I made with a picture of this cake stand. This project was super easy to make. I made it in two days because I wanted the glue to dry properly. I already have a very lovely cake stand but I wanted another one where I could place the gluten-free baked treats that I make for my stepdaughter. It didn't seem fair that the rest of us were able to have our treats displayed on a nice cake stand while she is reduced to a boring old plate. I wanted something special for her, where I could present her treats in a pretty and inviting way. Ever the frugal crafter, I decided to make one. While I was out on a girl day with my bosom friend, I searched the Dollar Tree for items that I could use to fashion a cute cake stand. I already had some ideas in mind, after searching the Dollar Tree website.

I knew the plate and bowl that I wanted, so I was able to find them quickly. I thought that I wanted to use another candlestick, but then I found the one that I chose. It is very solid and sturdy, and it was even heavier than the one that I had originally intended to use. Those candlesticks come in black or white, so I chose black. Then, I needed and handle. At first, I looked for a knob, but couldn't find one. Then, I looked and tealight candle holders, but I couldn't find one that I liked. I decided to think outside of the box and headed to the toy section. There, I found rubber farm animals and I thought that the sheep was not only the perfect size and weight for the handle, but it also matched the color scheme.


After I brought the candlestick home, I noticed that it was scuffed up. I decided to paint the entire surface with chalkboard paint, simply because I had it on hand. I left it on my deck to dry while I worked on the rest of the cake stand,


Using a clear salad bowl that I found in the catering section, I used the super glue that they sell at the Dollar Tree to stick the sheep to the bottom of the bowl. I flipped the bowl upside down, squeezed a tiny bit of glue to the bottom of the sheep's hooves and centered it onto the underside of the bowl. I set the bowl aside and allowed for it to dry overnight.


Next, I wanted to glue the candlestick to the underside of the plate. I found the center of the plate and I used a dry erase marker to trace the shape of the top of the candlestick. This way I could place super glue on the plate and the candlestick so they would adhere more securely.


After squeezing a bead of glue around the perimeter of the candlestick top, I added more glue on the circle outline and carefully placed the candlestick on the underside of the plate. I let that dry over night.


The next day, I had an adorable cake stand. The bowl just barely fit on top of the plate, so keeping it on was tricky. I need to add a lip along the edge of the plate to keep the top on better. Were I to try this again, I might use one of the plate chargers that are sold in the dish aisle. I really do like how this came out. It almost has that "Farmhouse Chic" that ladies seem to be going gaga over lately. I am just happy to have a cute cake stand for the gluten-free goodies. It fits the decor of my kitchen and it only cost me $4.00 to make, because I already had the glue and painting the candlestick is entirely optional. If you were going to do this with all new supplies, it could be done for $5.00, not including tax. Still, a nice bargain for something that you will only use on certain occasions. This would be a cute thing to try for different holidays, too. Think of the fun you could have with holiday decorations for the handle, and festive colors for the base! I had a lot of fun doing this and would likely try it out again. Until next time~ Toodahloo!

Thursday, September 28, 2017

Tackling Small Home DIY's and Pretending To Know What I'm Doing, pt.2

An old chair from a set that I had in college.
 As I mentioned in my previous post, I am a frugal diyer. I wanted to make little changes to the kid's rooms to help make studying easier this year. I gave my desk chair to my step-daughter and decided to use my yoga balance ball at my desk instead. My step-son never really used his desk, but when he saw her chair, he set up his desk and grabbed a spare chair that was stored away in our garage. I was surprised at this because I had previously offered my desk chair to him and he didn't want it. I suppose he decided to use his desk this year.
A layer of primer.
 Since he was going to begin using his desk to study at this year, I wanted to give him a more comfortable chair that matched his black desk. I went to my parent's attic and found a chair from a set of chairs that I had in college. The table is in our garage and I use it for a work surface, These chairs came with built-in cushions, that could be removed with screws. I removed the seat and sanded the surface of the chair to remove the gloss on the "wood." After wiping down the chair to remove any dust, I spray painted the chair in a highly ventilated area.
A layer or two of black spray paint.
 Once the primer had set, I painted several layers of black spray paint all over the chair, making certain that the layers were completely dry between coats. I used a can of spray paint that I already had on hand for the primer and I purchased the black spray paint for less than a dollar (I think it was 98 cents, but I'm not certain) at Walmart.
A fat quarter and hot glue to reupholster the seat cushion.
 While I waited for the paint to dry, I worked on the seat cushion. I spread my fat quarter, right side facing down, on my work surface and then centered the cushion, cushion side down, on the fabric. Using a hot glue gun, I wrapped the fabric around the cushion and glued it to the underside of the seat. I worked my way around the perimeter until the fabric was taught.
The final result.
Before I screwed the seat back onto the chair, I ironed the cushion to make the fabric nice and smooth. It really couldn't have been easier. I already had the chair and some of the materials that I used to make a chair for a study area. I only needed to invest in a can or spray paint and a fat quarter. This cost (roughly) $2.00 to complete. I think that is quite frugal and I like how it worked out. The chair matches the desk and the rest of the decor of my step-sons room and now he has a comfy chair to sit in when he's working on his computer. These are the kind of projects that I can handle. Some paint, a few screws, a glue gun, an iron and a sander are simply tools and supplies that I feel comfortable using and I feel happy making something old new again. Until next time~ Toodahloo!

Tuesday, September 26, 2017

Tackling Small Home DIY's and Pretending To Know What I'm Doing pt. 1

My laminate countertop after I sanded and cleaned the surface.
 I admit it, I am a bit of a home improvement diy wannabe. If I were a Spice Girl, I'd be "Crafty Spice," because I need to create. Growing up, I watched endless hours of  This Old House and Hometime on PBS. When the diy channel and HGTV became available on my cable channel package, I was a bit excited in a very dorky kind of way. To me, an idea of a good time is to cuddle up to my husband and watch Chip and Jo Jo and marvel at the before and after. When we were first able to get into our house last year, my husband spent a lot of time removing carpets and gutting the bathroom, while I scrubbed and painted walls. My kitchen needed love. When we are totally done with the kitchen, I will do an entire post on the before and after. Here I just want to show what I did to my countertops since I needed to re-paint a section last week. **I am not a professional. I am a novice, a housewife who experiments with inexpensive diy solutions. This is not recommended as a tutorial, it is simply a "show and tell" type of post. I am NOT an expert, I'm just showing you what I did..**
Adding a layer of primer.
 When we moved into our home it needed a lot of TLC. Most of it was on the surface. The old gal just needed a makeover with a little nip-tuck in one area. The rest of the makeover just involved some fresh paint, flooring, and curtains. With a bit of wall art, throw pillows and candles here and there. Since there was a lot of little things and an entirely new bathroom to install, keep on a tight budget was our only option. We didn't have the time nor the money to fuss about with installing new countertops. So, I did some research on Pinterest ( something I did A LOT during our home makeover) and I found a solution for updating our countertops for very little money. I bought a can of black chalkboard paint for $10.00 and a small foam roller for around $5 (we already had the roller handle, we just needed more sponge rolls). I already had a can of paint latex with a built-in primer, so I used that to prime the surface. The first time I did this last year, I skipped sanding the countertops. I shouldn't have done that, but I was in a rush. I recommend sanding the laminate surface and cleaning it so that the paint can really adhere to the laminate countertop. Since I skipped that step, it peeled off last week, which was why I had to do it again. This time I did it the right way.

My laminate countertop after the primer had dried.
 After sanding and cleaning the surface, I painted two layers of primer on the entire area. I made certain to really let these dry before adding another coat. This primer and the chalkboard paint took twice as long to dry because it was very humid outside.
My laminate countertop after I painted a few layers of chalkboard paint onto the surface.
 Once the primer was dry, I painted three coats of chalkboard paint, making sure the layers were dry before adding another. I really should have let each coat dry for a day to harden properly, but when you have pets trying to jump on the countertops and you need to use the countertop, that is hard to do. I should have waited a day to let things really dry and made sure to do it when it isn't humid. After all of my hard work, once hot dinner plate on the paint made the paint bubble and peel away. This didn't happen last year because we weren't living in the house yet, so it had plenty of time to harden, not to mention it was colder and not at all humid. I have covered the spots with electrical tape in order to conceal the spots and also to protect the paint from peeling even more.
The end result after two layers of wax.
Once the paint was dry, I smoothed on a layer of butcher's wax all over the top surface and I waited for it to dry. After the wax hardened I buffed the wax until shiny and smooth, then I added one more layer for extra measure. I really do love the look of this, it's a fantastic solution for revamping a laminate countertop when you are on a budget. Down the road, we will be replacing these, but for now, this works. The only thing that I didn't use to make this a total success was PATIENCE. If you don't let the paint harden for at least 8 hours after it has dried, it will not set correctly. It's a lot like painting your fingernails. If you add a base coat, you let it dry before adding your nail color. If you don't let you nail color harden between coats and then try to add a topcoat, the nails never dry completely and your nails smudge.
When the weather changes to more Fall-like weather and the humidity finally dissipates, I will touch up the spots to peeled. Until then, the tape covers it nicely, the color is an exact match, fortunately! This post proved to be longer than I had expected. So, I will post about my other diy project in the next post. This post isn't meant to be a tutorial by any measure. I am a novice who needed an inexpensive solution and this is how I solved my problem. There is paint made specifically for countertops, but those kits are so pricey, that you might as well buy a new countertop for the price. This is what I did for my home and it worked, but it still needs to be corrected in a few areas. At any rate, I hope you enjoyed my little experiment.
 Until next time~ Toodahloo!

I Hosted a Tryazon Party Featuring Wiley Wallaby Licorice

  Before I begin writing about my party experience I want to first disclose a few things. First, I was not paid by Wiley Wallaby or Tryazon ...