Showing posts with label Spring. Show all posts

Friday, June 1, 2018

The Evolution of My Office Renovation

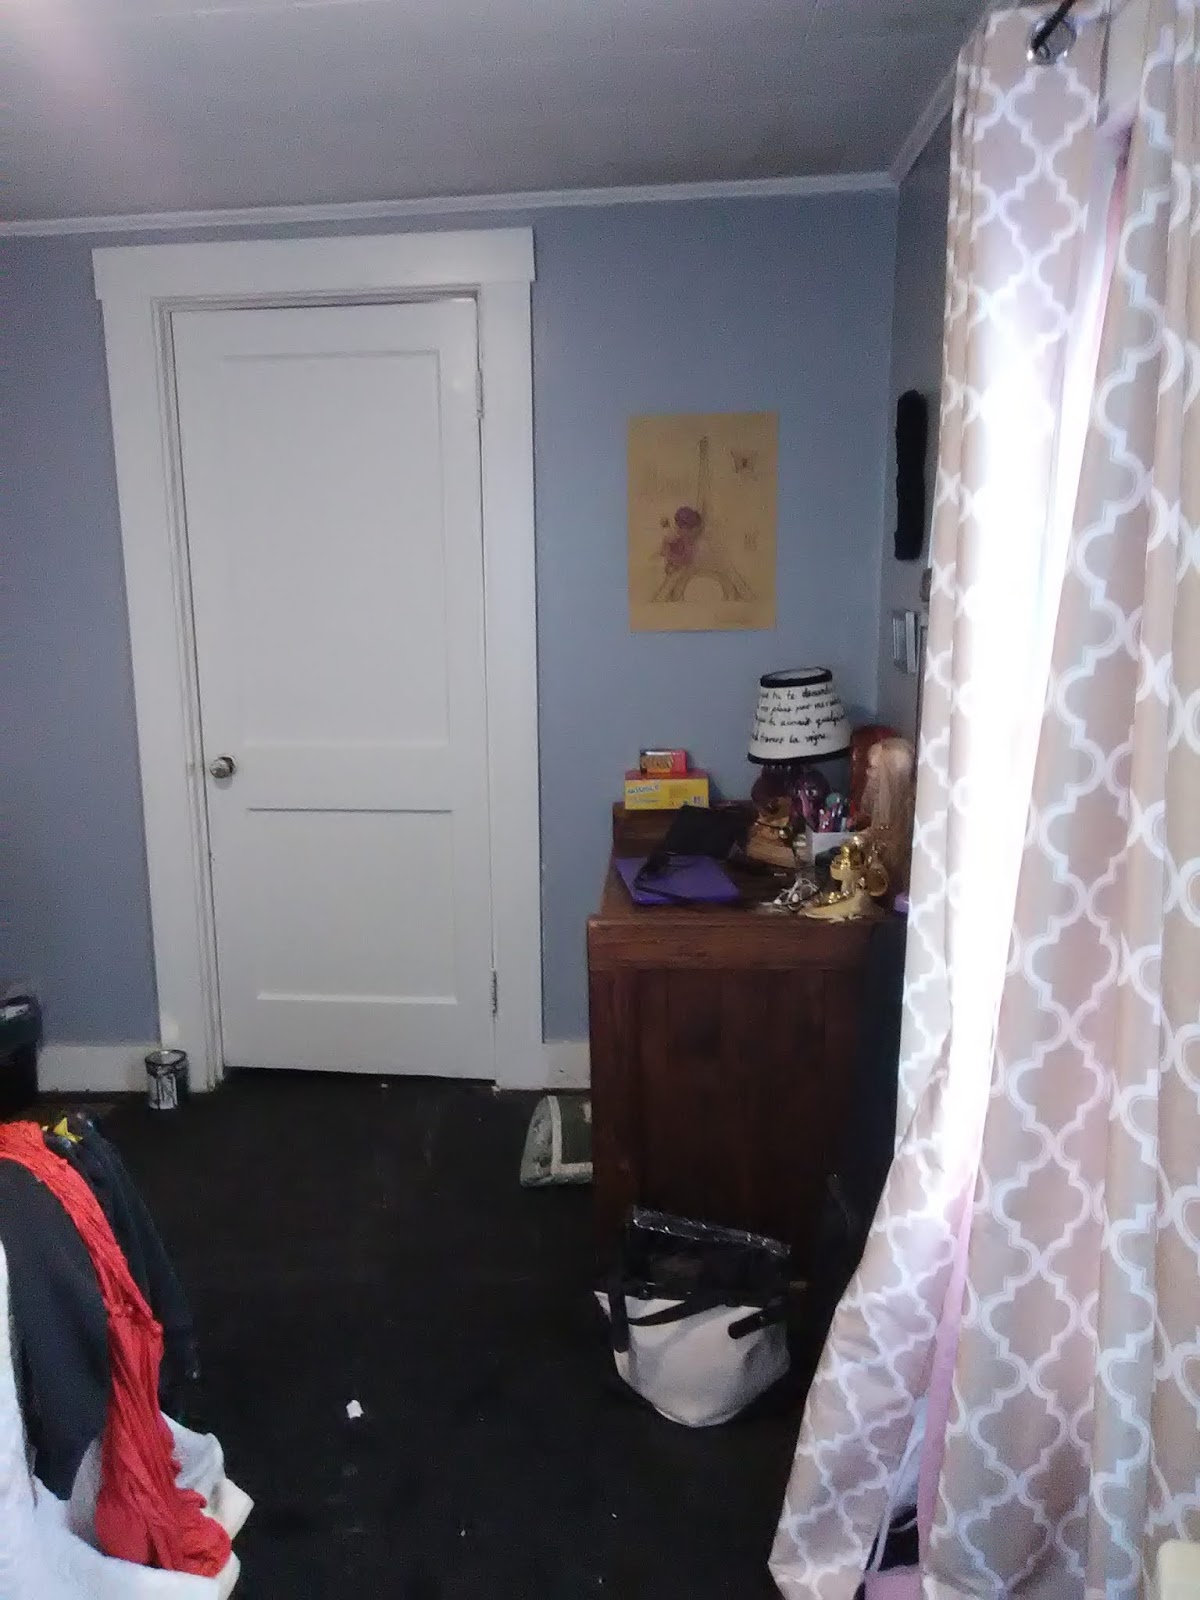
This was taken the first day we began working on the house.
When we bought our house nearly two years ago, we knew that it needed some work. When we toured the house we saw that the house had great bones, it just needed some elbow grease, some paint, a bit of spackle, some fresh curtains, new flooring, and a decorative touch. It also needed imagination, patience, and time. So when we were handed the keys over Labor Day weekend, we couldn't wait to get into the house and start pulling up the carpets and clearing away the debris.

Flynn enjoyed exploring the new space.

The house had enough bedrooms for each kiddo, which was great. The room that is now my office was the bedroom of the oldest child who has since gone away for school, life, etc. We let each child pick out what the wanted their room color to be and we bought paint accordingly. We were on a very tight budget so I actually blended a can of white paint that we already had with a bit f black paint that we got marked down at Home Depot (not sponsored). The walls in the room had been an off-white or cream color with very old wall to wall carpeting. There was also an odd shelving unit built into the wall that had access to the stink pipe. I really didn't want that pipe visible, so we removed the shelving and walled it off. The room opposite to the office is the bathroom and that entire room had to be gutted. I'll post about that another time.


So, as requested by the son, I painted the walls grey and the carpeting was removed and I painted the floor black. He decorated the walls with his t-shirt collection and it was a typical teenage boys room. After he graduated high school and went away to college I wasn't jumping at the bit to redecorate. I wanted to wait at least a year and see what would happen. However, I decided to move along with the process when it was clear that he was growing up and eager to be on his own. His bedroom was becoming a spot for debris to land and was a waste of valuable space.  I decided that it was time for me to make an office, where I will eventually be able to work and keep the spare bed in there just in case a guest needs a comfortable place to rest.

Fearing the raisin would overpowering for a small room, I used it to create an accent wall.


Eventually, the door to the bathroom will be removed and the wall will be finished.

I based my entire design on a California Raisins lamp that my grandmother had made me when I was a little girl. I had recently unearthed it from my parents' attic and wanted to use it in my new office. I chose a color that would closely match the color of the raisins on my lamp. I chose Color Place Rich Raisin in a satin finish. I used black chalkboard paint to paint my floor. This made the floor more durable and doesn't scratch as easily. 

Murr really likes the room. It is a nice space to take a nap.


I made curtain rods with wooden dowels that I found at Hobby Lobby (not sponsored), painted them black, and I made finials using a black macrame yarn/rope and tied them into fishermen's knots. I purchased two sets of thermal/light blocking curtains on ebay (not sponsored) for $10.00/set. I also bought gold vinyl star decals on Wish (not sponsored) for $1.00. If you haven't noticed, I decorated this room on a budget. It took a lot of time to gather all the materials together, but it came out great. I will do a part 2 to this post, showing the decor in more detail. This will be a cozy space to work in. Right now I am waiting for Rory to get a little older and to outgrow his chewing habit. It is very distracting to work in the office with him in it right now. Also, Mildred is currently residing in my office with her litter of kittens that she birthed a week ago-more on that in a later post. For the time being, my office/guest room is a kitten nursery and I likely won't be doing much work in there until September. For now, I just grab materials from there to use for projects that I work on in other places in the house. Stay tuned for the follow-up to this post which should be up next week. Until next time~ Toodahloo!

Monday, May 22, 2017

When It Rains.......


I must admit, I am very happy to see that winter has finally come to a close, it was a very dreary winter. This spring has been a wild one. We had a long stretch of rain in early May. I know the saying about April showers and May flowers, but in APril, it was still snowing. Where I live, it is more traditional to expect our rain falling down in May. Still, after what seemed like an endless rain storm, we finally had some great days. Prior to the long stretch of soggy weather, we did have one really great day. The rest, however was pretty bleak. Over the weekend, I was able to enjoy the sun and do some yard clean-up. I have vegetable plants started and in a few weeks, I will mark out where I want my vegetable patch to be and I'll get that tilled for planting. So far, I've been cleaning the yard and getting flowering plants ( roses, lupines, peony) into the ground. I must admit, the yard work is very exhausting and it takes me twice as long as the average person to do and it runs me down much faster, too. My kitty, likes to watch me work outside. However, I think he prefers to have me inside.


When have a nice flowering bush by our back entrance. We needed to prune it and groom it a bit, but it really is lovely.


I haven't noticed any perfume wafting from this, like you would from a lilac or an apple tree, but it's pleasing to the eye.

The other morning, I was having my morning latte and I happened to look out my kitchen window and was delighted to see a hummingbird hovering around the blossoms. I was so excited, that later in the day, I set up my hummingbird feeder. I see and hear many birds in my yard, particularly the chickadee. It is nice to listen to all of the birds in the morning.

Lately, I've been trying to work on other projects during the gloomy days. I have a new quilt project that I am hoping to finish over the summer months. I like to sew patches while I watch shows on Netflix. Last week, I watched the new CBC series Anne With An E. If you can watch it without comparing it the the Kevin Sullivan production, you might be able to really like it. While it does deviate from the books, it still is a good adaptation. At the end of the week, last week, I accidentally closed my fingers in the garage door. It was very painful and it makes it difficult to type. I've broken fingers before, so the pain is something that you get used to. The fingers don't hurt so much now, as long as I pay attention to what I"m doing and I don't hit them on anything. Sometimes, tapping the keyboard stings a bit. So, I won't make this too long. I will post more when my hands feel better and I have better sensation in the tips of my fingers. I'm sure you're wondering how a person manages to close their fingers in a garage door, well it takes a clumsy and distracted person to accomplish something like that. I am that kind of person. I'll end this by saying that it was just that kind of week. More on that in another post. Until then~Toodahloo!

Sunday, April 2, 2017

T-Shirt Refashion

 This week has been a doozy! Most of the week consisted of days that were grey, windy, sometimes rainy, while other days we had flurries. It was a good week for working on projects. Today, it is actually sunny and calm. This is a great day to inspire me and to give me the boost that I needed to sit down and compose a post. IN the spring and summer months, I stay as far away from pants as possible. I prefer skirts and dresses to shorts. I reserve shorts for nature walks and gardening. I made a group of listings on my amazon wishlist for summery dresses, all of which looked comfortable, were modest and inexpensive. The problem with the dresses was that most of them came from China, so getting the correct size was proving ot be tricky. The reviews that I read were also very inconsistent. I think that part of the confusion comes down to the fact that women have varying ideas of comfort and fit. What might be too short or too clingy for one woman, might be exactly what another woman looks for in her dresses. Ultimately, I decided to find similar styles at the thrift store. I found a nice pile of cute dresses and a skirt at Goodwill. However, there was one dress that I knew I'd never be able find a duplicate for, so I decided to make one myself.


I visited my local thrift store, where you can fill a bag full ( I mean FULL) with clothes for $3.00. It's fantastic for crafting. I think I'll post about my thrifting in another post. Otherwise, this post will be way too long.
I was able to find a collection of shirts that had similar color tones and tossed them in the bag, not knowing how I'd pull all together. I figured I would decide the design once I brought the shirts home. From the pile of shirts, I selected a black crop top, a purple long sleeve t-shirt and then a grey and purple polo shirt. 


At first glance, the two shirts with the purple were the exact purple. The lighting at the thrift store isn't spectacular. When I inspected the shirts at home, I was delighted by the subtle pattern in the purple long sleeve shirt. Ordinarily, I would pair a pattern with a strip, but in this instance they work.


I left the crop top as it was, and decided to base the rest of the dress off of that, keeping in mind the dress that inspired this dress. I cut the purple shirt one inch below the armpit. That shirt had thin strips, which made it easy to cut a straight line. Then, I cut the polo shirt to the length that I thought would be appropriate. Again, the polo shirt had a stripe, so it was super simple to cut in a straight line. I left the bottom of the polo shirt as it was, that way I'd have a clean hem line. For the sleeves, I cut the sleeves off of the purple shirt and added them to the 3/4 length sleeve of the crop top.


I matched the purple shirt to the crop top, right sides facing each other and pinned them in place. I used a zigzag stitch with a heavy duty needle and slate colored thread.


When I was finished with that, this is what the top of the dress looked like.


Next, I joined the polo shirt with the purple shirt, right sides facing, and I lined the polo shirt just under the finished hem of the purple shirt. This way the shirt would be bulky. I also, trim the excess fabric after the shirts were joined.


Finally, I added the sleeves to the drop top and cleaned up the cuffs.The shirt dress still needs to be washed and ironed before I wear, and that is okay. After all, it's still only in the 40's here. This will be a comfortable dress to wear on those days that are a little cooler, a bit less sunny. I really do like the end result, it is similar in style to the dress that I wanted and I know for certain that it will fit me. Best of all it was a lot cheaper to make than to buy.

My next sewing project will likely be a new quilt. I want to have a new, lighter in weight, quilt that will be perfect for the warmer months. Also, I want to make a quilt that will pull up more of the colors of our bedroom. I am going to get some fat quarters, today, and that will be my focus of the week. I have been wanting ot do a post on makeup palettes, but I'm still waiting on a palette that is shipping from China, so it could arrive any time this week. My fingers are crossed that it arrives soon! When it does, I'll play with it a bit and then do a post on that. Until then~ Toodahloo!


Tuesday, March 7, 2017

Early Spring Cleaning


After the holiday season had finally calmed down, we still had numerous birthdays, Valentines Day and the Superbowl to experience. It seemed as though I was spending a great deal of time either planning special dinners, baking desserts, planning parties or cleaning up after parties. When everything finally calmed to a slow crawl, I realized that I couldn't wait for Spring to finally get here. Even though Punxsutawney Phil declared that winter was still here, I was ready to see it go. Then, we had a blizzard... I mean, really?  In an effort to fool myself into thinking that Spring was here, I decided to get a jump start on my Spring cleaning. That way, once the season does actually change, I can focus my energy on other projects. I have been organizing my kitchen. When we moved into the house, we were focusing more on moving in and less on making things perfect. Now that we have everything here and (mostly) unpacked, I can move things into proper order.

 I really wanted to get my kitchen in order, since I spend so much of my time in that room. I wanted to make it more organized so that I would have an easier time when I am baking and cooking. In a cupboard next to the stove, I keep my spices, herbs and baking supplies. The contents of the cupboard were sort of organized, but not in a way that I felt was tidy enough. I went to the Dollar Tree and purchased small bins and I used those to hold loose items and to wrangle my herbs and spices. Now, the middle shelf it dedicated to cooking items, while the bottom shelf is reserved for baking articles. Everything it easily within reach and much easier to find.

Inspired by a Pinterest pin, I organized my measuring spoons. I always had a difficult time finding the size that I needed. I have several collections of measuring spoons and they were all thrown into a drawer. I attached mountable hooks that I found at Walmart onto the inside of the cupboard door and organized all my spoons by size. Now, when I need a 1/2 teaspoon, it is so much easier finding one. I also added a list of substitutions that I had printed, out long ago. This way, if I ever discover that I am missing an ingredient, I can quickly look up a substitute. It is very handy having everything within an arms reach. 

Now that my cupboards are tidy, and I've moved my measuring spoons, my kitchen drawers are far less of a mess. We will be putting the new flooring in the kitchen soon, too. This will make the kitchen renovation nearly complete. Hopefully, by the time Spring actually does get here, I will be able to share before and after pictures of my kitchen. It certainly has come a long way! I look forward to sharing it with you. Until next time~ Toodahloo!


Friday, June 10, 2016

The Great Artisan Bread Experiment

I bought this online and neither the seller, nor the online store sponsor me. I just thought I should point that out before there's any sort of confusion. I DID get this discounted for an honest review, but I was not paid to feature this item in my blog. I just happened to use it to make delicious bread. I will admit, that I really liked this and I am glad I got to try it out.
If you've read a few of my posts, you might have observed that I have many hobbies. One of the more obvious of which is baking, but another hobby of mine is reviewing products. I like testing products out; most of which, I get at a discounted rate in exchange for my testing and reviewing the product, honestly and fairly. I have a lot of fun with this, and it allows me to write for an entirely different genre. So, when I have the opportunity to combine hobbies, I'm more than delighted. Recently, I acquired a banneton basket, which is a wicker basket used for proofing bread dough. After searching Pinterest for artisanal bread recipes, and making my own additions to the recipe, I had delicious bread.


When I first found the recipe that I wanted to use, I was very excited. It only had a few ingredients, and it claimed that I didn't need to knead it! However, once I started making the bread, I soon discovered that it was a two-day job, as I had to mix the batter and let it rest overnight, When I finally returned to the dough, it was far runnier than I'd expected. So, I added more flour and kneaded it (I couldn't help myself). Then, I let it rest in the banneton. I lined the basket with a tea towel, to prevent the dough from sticking. After a few hours, it was ready to go into the oven.
According to the recipe, the dough had to be placed in a Dutch oven, with a lid and baked in the oven for 25 minutes. Then, I had to (carefully) remove the lid and bake the bread for an additional 10 minutes. I was very nervous about this. I wondered if my herbed bread would even come out. After all the work that I put into it, would all be wasted? However, once I sliced into the bread, I soon found perfection. It tasted just like the fancy bread at the grocery store. It made fantastic toast and was outstanding with fried eggs for breakfast. When my husband first tried it, he said that it was chewy, but I explained to him that it was meant to be that way. He loved it. So, for my first time baking artisanal bread, I really lucked out with the recipe that I used. It was super basic. I added sage, rosemary and thyme to the mixture. Had I any parsley, I would have added that, too. I think this would be great with Herbs de Province added. I've been dipping this in lovely herbed olive oil and it's dreamy. I think that I might need to make herbed olive oil, this summer, perhaps some herbed vinegar, as well.

The other day, we put in our garden. we're still adding more vegetable plants. As my father plants vegetables in his garden, whatever has left over, he brings to us and we're planting those, as well. I hope the veggie garden works out this summer. Already, our flowers look gorgeous. The lilacs have come and gone, but now the peonies, irises and lilies are blooming. Keep an eye out on my Instagram and Tumblr pages for pictures of my flowers and my latest baking experiments. Until next time~ Toodahloo!

Wednesday, May 25, 2016

Spring, Luxurious Spring

The past couple of weeks have been super busy. The school year is winding down, the track meets are nearly done, we just had the spring concerts, a wedding is coming up (FAST) and gardening is in the future. While all of this was happening, I found myself first dealing with seasonal allergies and then I developed a nasty cold, which I'm at the tail end of. I will be happy when it finally goes away. However, I don't let it bother me too much, as the weather has been fantastic. It is so nice to be able to have the windows open, to have fresh air and to not have the furnace on. Outside my window, I see green grass, leaves on the trees, lilacs blooming, peonies waiting to open and dandelions...everywhere!


A week ago, I was given a surprise wedding shower. It wasn't expected, but I did know that it was in the works. Although, it was a surprise, it was a nice surprise. My cousin organized it and she did a wonderful job. When I came home, after a nature walk with the dogs and the Mister, I found my aunts, sisters, cousins, mum, future relatives and my bestie all in my kitchen and dining room. The house was decorated with lots and lots of flowers. It was a wonderful time.


Little bouquets, held in jelly jars, were placed throughout the downstairs of my home.


They lasted for well over a week! It made me think of "Anne Shirley" who loved to overwhelm her home with wildflowers.


Outside, the flowers are everywhere. From tiny blue flowers....


To fragrant apple blossoms.


When I visit the lake, the loons are keeping a safe distance, but a close enough to observe.


Look at how much my plants have grown! I can't wait to start my veggie patch, if only the two local groundhogs would keep a respectful distance.....

So, that is what I've been up to, lately. Once things calm down I will resume my reading and I'll be sharing what I've read and my thoughts on the books, once I've read them. Well, once things have calmed down and the Orphan Black season finale airs. This season has been insane, I think it's the craziest season yet! Yes, once all of that happens, I can go back to being a summer book worm...the new season of Pretty Little Liars will begin soon, but that is just one show. I can work with that! :) I will keep you posted. Until then~ Toodahloo!

Thursday, May 5, 2016

Spring Cleaning and Crafting Pt. 1

Now that spring is here, I'm finally seeing buds on the trees, I have been spending my rainy days crafting and working on home improvement projects. The race is slow, but steady and with the unpredictable weather, it's a cat and mouse game.  Some days, I get outdoor work done and other days, I get indoor work done. I am, admittedly, ambitious. I tend to write up long lists of tasks and projects to complete. I am learning, though, to not try to get these entire lists done in one day.I really want to beautify the already gorgeous yard, start a veggie garden, decorate the inside of the house, craft, prepare for next winter, plan a wedding, and do all the everyday stuff, like baking and cleaning, too. Again, I'm learning to NOT try to get it all done in one day, I've been finding a tremendous amount of inspiration on Pinterest....


I began this project, last year, and completed it this month. I know that it was inspired from a Pinterest pin, which may have been art inspired by Pottery Barn; it was so long ago, I can't remember. Here, I took a large scrap sheet on panelling board and glued an assortment of paint sample chips onto the board.


After taking a break for a year, I finished gluing the sample cards onto the board. Then, I made a monogram template. I used an old cereal box and free-handed the letter. Then, I cut out the shape and taped it to the board.


After that, I carefully painted the letter "B" with black acrylic craft paint, making certain to not get under the template.


The end result was a fun piece of wall art that cheers up an empty space on my dining room wall. 


This is an entirely different sort of craft project. Here, I made small fire starters. In the winter, we burn wood to heat the home. On damp days, I often have a difficult time getting the fire to catch. So, I decided to make these, ahead of time, and save myself some frustration this winter. I squirrelled away some toilet tissue rolls and dryer lint. In know that sounds a bit like an episode of Hoarders. However, I figured that since I'd throw this out anyway, why not make some use for it. So, I collected my dryer lint and kept it in a bag. Once I had enough cardboard rolls, I cut them into smaller bits.


I lined the cardboard rounds onto a cookie sheet and stuffed them with the dryer lint. After which, I melted some paraffin wax, that my mother hand on hand, and I poured the wax onto the dryer lint. I know this seems very odd, especially since it will be months before I'll even use these. However, I know that once summer comes around, I'll be busy gardening and I won't have time for this. I'm trying to prepare for winter ahead of time; this way, I'll be set once the cold weather returns. For now, I have these stored away in a box. Once winter arrives, it will be one less thing for me to worry about. 

I will be continuing to prepare for the colder seasons, periodically, between now and the fall months and I'll post about those projects as I work on them. For now I'm focusing more on spring time projects and preparing for the summer months. I have more crafts that I have been working on, but it would have made this post far too long; which is why I'm posting a part two to this. Between now and the next post, I'll be crafting, baking and diy-ing even more.and I'll have much to share with you all. Keep an eye out on my instagram and tumblr page for posts. Until next time~ Toodahloo!


Monday, April 25, 2016

Fuzzy Distractions


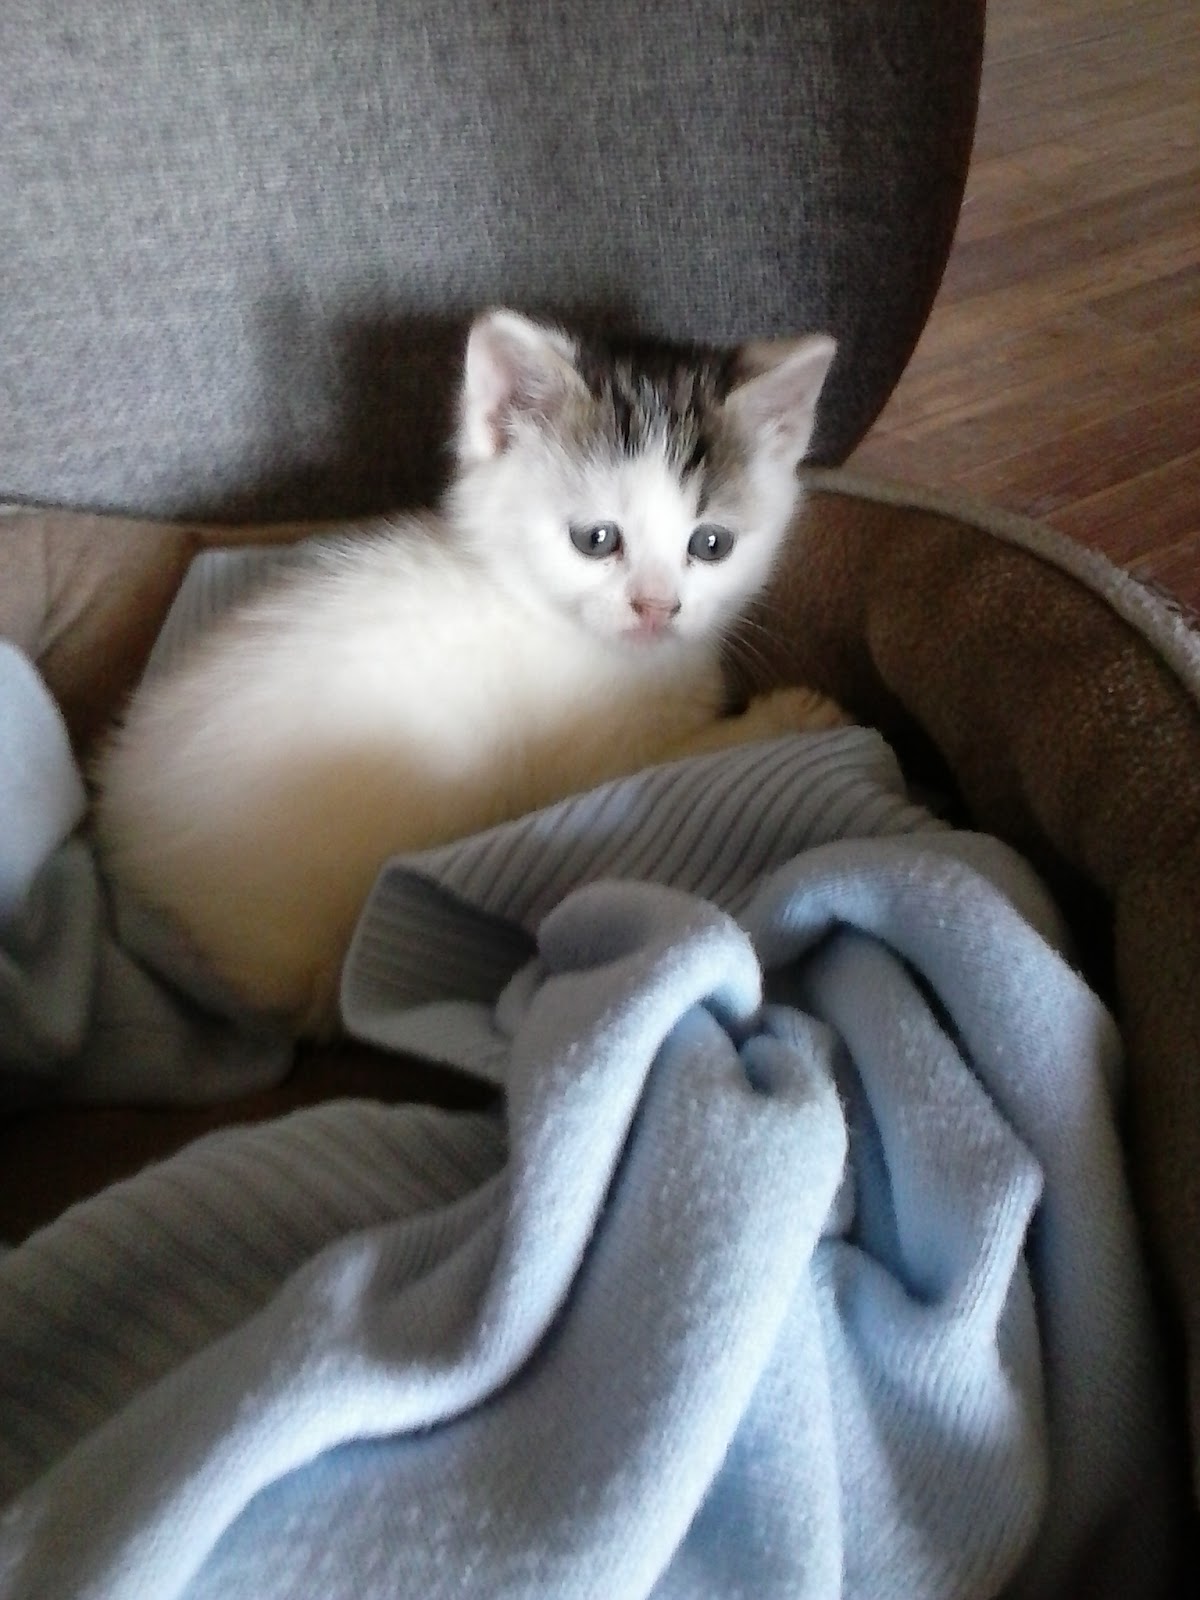
Last week, I fully intended on writing a few posts about Spring diy projects and a craft project that I'd been working on. I had the photo uploaded and edited, and then this fuzz ball came into my life. I was at my desk, beginning my work when the Mister set out to pick up one of the kids from track practice. Being that it was Spring break, this was late in the morning. Just before he set off to complete this errand, he found an ad online for free kittens, local, and time was limited. I figured he might send a message and get some sort of response by the end of the day, When it took him longer to come back from picking up the kiddo, I began to wonder. One hour later, he came home with this delightful kitty in tow.


She was (is) so tiny, with a wee tail and a squeaky meow. She was a bit frightened and needed to be held a lot. The rest of my day, I had her on my lap as she napped and although I tried to get some work done, my efforts were thwarted by this cuddle bug.


We threw lots of names around, trying to think of the most fitting name. Then, one of the kids suggested "Freya," after scouring Google for goddess names. That named felt like the perfect fit for the kitty. After a weekend with her, the name has proven to suit her, perfectly.


I did manage to pull myself away a few times to do some shopping and to rake up a yard, but that was only because we left her in the care of one of the kids. She is still growing more comfortable with the dogs. The smallest of which is having the most difficult time adjusting to the new family member. The other day, I found her hiding on top of my cookbooks. I think she might have been trying to escape the curiosity of the canine dwellers.


As I compose this post, she is curled up on my, lap resting quietly, and I am finally able to complete some tasks. Once she's bigger, she'll be more independent. Hopefully, she'll prove to be an excellent mouser (the whole reason for getting her); if her play activity is any indication, the mice should quiver in fear........

That is what is going on in the land of Lady Toesocks. The rest of the week will include more crafts and more posts about the diy projects that I completed, last week. The weather is looking much better and there will be more outdoor work and more baking happening, too. I'm sure I'll tell you all about it! Until next time~ Toodahloo!

Wednesday, April 6, 2016

I Made A Kitchen Chalkboard!

Now that Spring is here I've been itching to do some housework. While it's still far too cold to do any yard work or work on my front porch, it was in the 30's today, I can still spruce up the interior of the home. The other day, I began working on touching up some of the paint that has chipped away throughout the house. Then, I decided that I really wanted to have some sort of message center in the kitchen. We do have a bulletin board, of sorts, but I wanted something different. After being totally incapable of finding my roll of cork, I decided to just have a chalkboard. The entire project was completed using materials that we already had around the house!


Since I am not handy with a saw or a drill, I had the mister construction the board bit. It already looked like a chalk board, even without the paint. Then, I spent the bulk of the weekend in a minivan travelling up north to see choral competitions. So, this had to wait until I wasn't exhausted anymore.


I first began my painting stage by painting a layer of chalkboard paint on the inside surface of the board. We did tape off the edges of the frame so that I wouldn't accidentally get paint on the it. 


I had to allow the chalk paint to dry between layers; this is when I painted the frame.


After a suggestion from the mister, I found a phrase that I liked on Pinterest and I painted that on the sides of the frame. I used white acrylic paint for this step.


After everything had dried, I "distressed" the board. I first used sandpaper to wear down some of the edges and to rub off some paint. Then, I used brown shoe polish to rub onto the exposed wood, I also smudged it over the white letters and on the sides of the frame, in order to make it look aged. I really like the way it worked out. I especially like that everything was made with materials that I already had (besides the shoe polish). Now, I can post what's for dinner and we won't have to answer the question "What's for dinner?" Also, if there's a school event coming up, we can write it on the board to remind ourselves. That is one crafty project down with many more to go. I will keep you updated as I complete more projects, Until next time~ Toodahloo!

I Hosted a Tryazon Party Featuring Wiley Wallaby Licorice

  Before I begin writing about my party experience I want to first disclose a few things. First, I was not paid by Wiley Wallaby or Tryazon ...